 |
|
|
|
|

|
|
|
Motocross
Madness 2
 Armadillo
Track Editing Tutorial
3D Max 3.1 Object & Export
by Maui_cool & Naz88
|
| |
[This tutorial is for people who have some knowledge of 3d Max 3.1, photo editing programs
such as Photoshop & Paint Shop Pro and the MCM 2 Track Editor "Armadillo".]
Page 3 [of 4]
How to apply the texture to your object in 3dSmax
You should have left 3DsMAX open, so return into MAX.
Now is a good time to save your MAX scene.
[
NOTE: It is most likely best if you save it the same name as your texture and object, so in this case save as... haybale.max]
1. Now you are in MAX and looking at your object - you will now need to edit the materials. There is 2 ways to get to the material editor -
you can either just push the "M" key on your keyboard, or you can go to the "TOOLS" menu and select "Material Editor".
.

2.
In the Material Editor - click the map box to the right of "Diffuse".
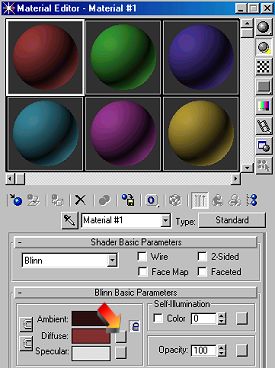
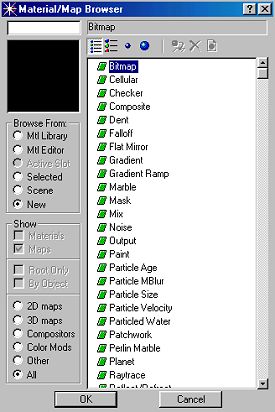
3. This window (below) will popup asking you for your bitmap - which is the .tga image we created in Photoshop - click on "Bitmap", then click "Ok".
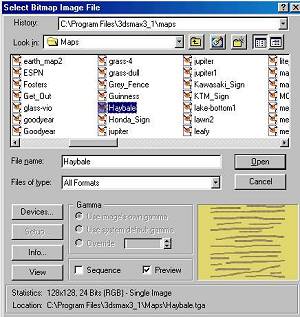
4. Another window will pop up - usually the 3D Max "Maps" folder. Pick the "Haybale.tga" which is the tga image we just created in Photoshop and click "Open".
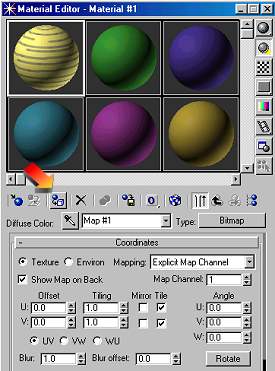
5. You should now see your texture applied to the first material sphere in the editor in the top left corner of the Material Editor.
Click the indicated button, as in the pic below, to "Assign Material To Selection".
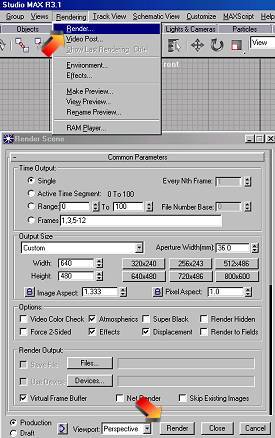
6. Now you can render your object to see how the texture looks/fits and take a screenshot to use for the object pic in Armadillo.
To take a "Screenshot" of your object.
Click the "Rendering" button at the top of Max.
When the "Rendering" window pops up, click "Render" at the bottom of the window.
Now, take a screenshot by pressing the "Print Scrn - SysRg" button on the top of your keyboard.
Go to your photo program of choice and click "Edit" + "Paste".
"Crop" the pic to just the object
Re-size it to 133x103
Save it as a 24 bit tga and it must be named "Haybale_art.tga".
Put it in your "UserModels" folder.
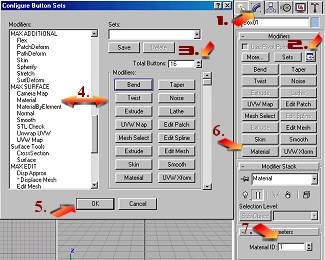
7.DO NOT skip this step. - Make sure the material you applied is "Material ID: 1".
As in the pic below:
1. Click on the "Modifier" tab.
2. Click "Configure Button Sets".
3. A box will pop up - Add one number to the total in the "Total Buttons" box.
4. Find "Material" with the slider and drag & drop it to the empty button you just created.
5. Click "OK".
6. Now, click the "Material" button.
7. Look in the "Material ID" box to see if it's "Material ID:1.
We are finished creating the object.
|
Proceed to: How
to export using "Unibastard".
tutorials index
Copyright © 2001 Maui_cool All rights reserved.
|
| |
|
| |
|
 |
 |
 |
 |


