
|
|
|||||||||
|
|
|
|
|
 |
 |
||
| Motocross
Madness 2 Armadillo track editing tutorial Gateless Start/Finish Line by DBR_suesman and garagedog edited by mike_mccue |
|||
|
Here
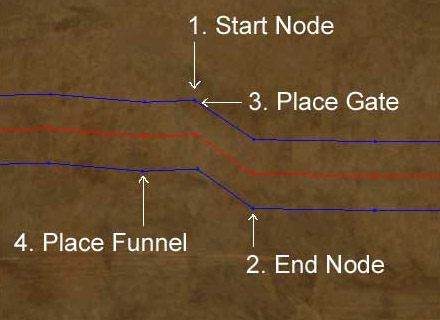
is a quickie on how to get rid of the startgate. I have only found success
when placing a new spline and when placing the gate near the node where
you started splining. I
suggest you make test track to start with. A big thanks goes to
DBR_suesman for figuring this
out. -gd |
|||
 |
|||
|
|
|||
 |
|||
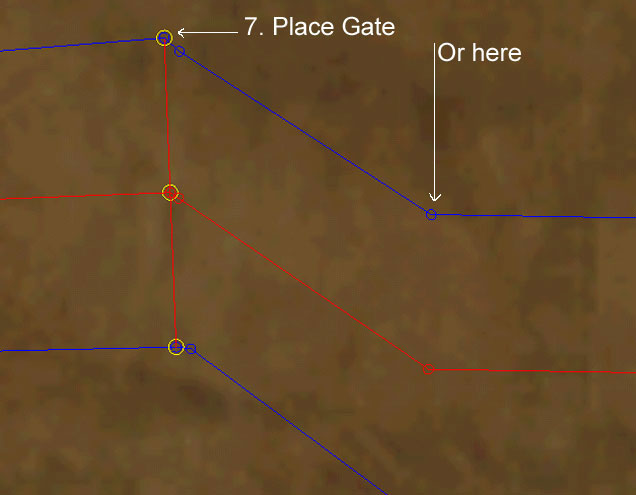
7. This is the most tricky part: |
|||
 |
|||
| TwistedDIRT would like to especially thank DBR_Suesman and gargedog for creating the content in this tutorial and allowing us to edit and present it in the tutorials section. | |||
|
|||
|
|||||||||
